Installation
Virtual appliance
A virtual appliance can be created at any time using the VM Build Service. The appliance will be sent to you via Cryptshare.
|
Please note the article Security Audit |
Scope of delivery of the VM Build Service
The following files are shipped to you by the VM Build Service
-
The virtual appliance (.VMDK file)
-
The configuration file for the virtual appliance (.OVF file)
-
The required passwords (.TXT file)
-
The information about required product manuals (.TXT file)
Supported host versions
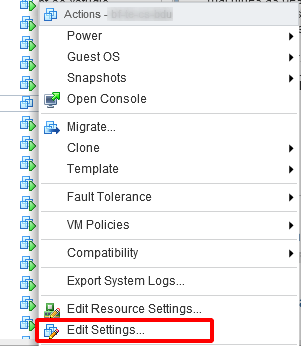
Cryptshare virtual appliances will be delivered in the version 4 of the virtual machine. This version is compatible with VMware ESX Server Version 3.0 and higher. If you use a newer ESX version, please upgrade the virtual hardware version as follows:
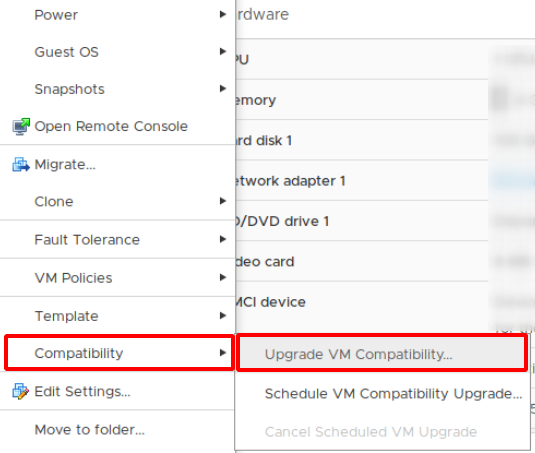
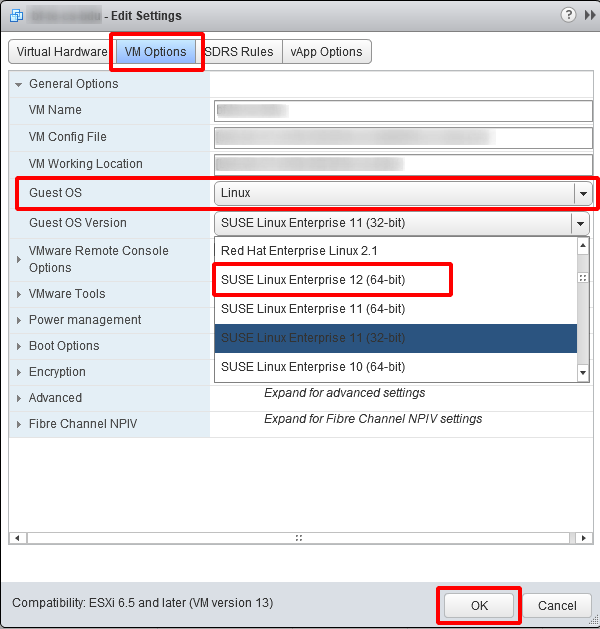
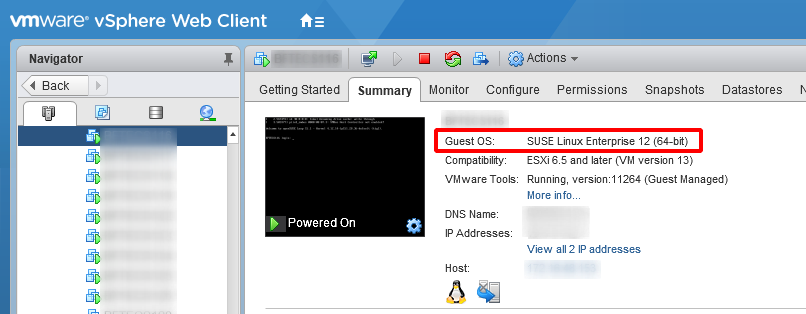
Additionally set the Guest OS settings to the newest version of SUSE Linux Enterprise 64bit provided by your vSphere
ESXi Server 4.x and higher
-
Open your vSphere Client
-
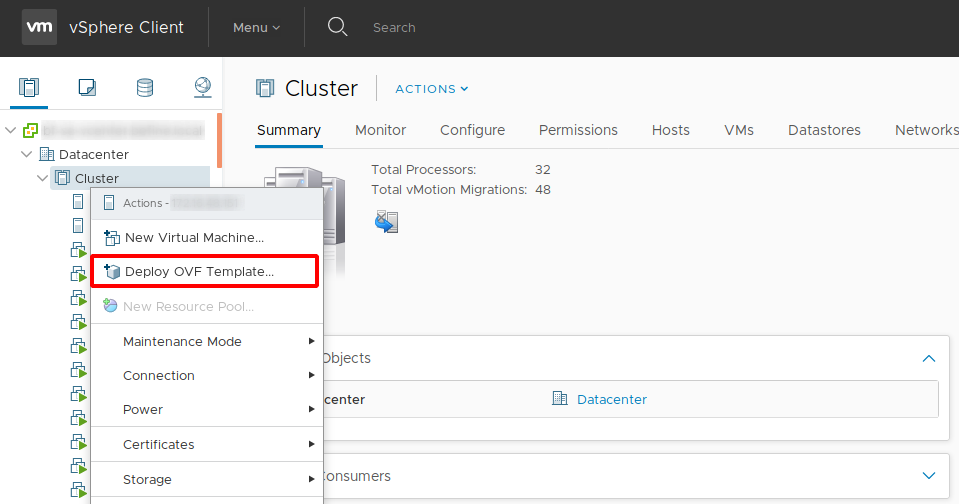
Right click to a cluster
-
Select Deploy OVF Template
-
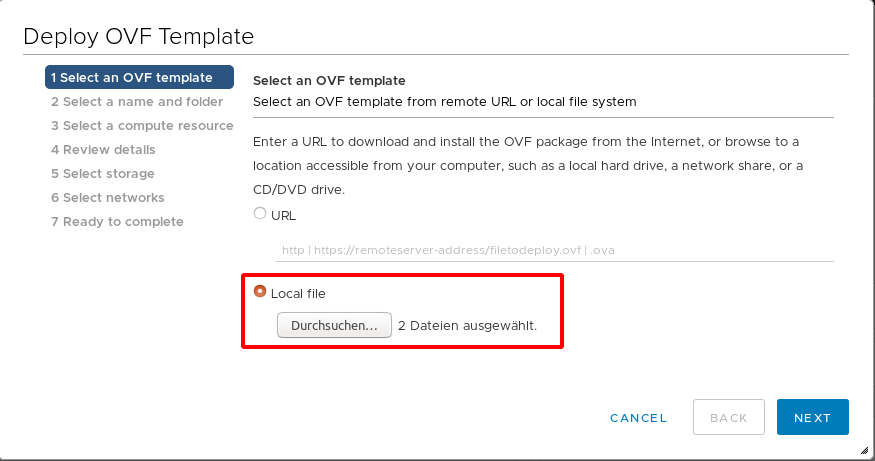
Click Browse and navigate to the storage location of your virtual appliance
-
Open the configuration file (.OVF) and the virtual disk (.VMDK)
-
Follow the instructions on the screen
Installation without ovf configuration file
If the configuration file (.OVF) is not available or the import is not working, a new virtual machine can be set up alternatively. Use the received .VMDK file as the virtual disk for the new machine when setting up the new virtual machine. It is recommended to use SUSE Linux Enterprise Server 12 (64bit) or higher as guest operating system. For all further options the default option selected by the wizard can be used.
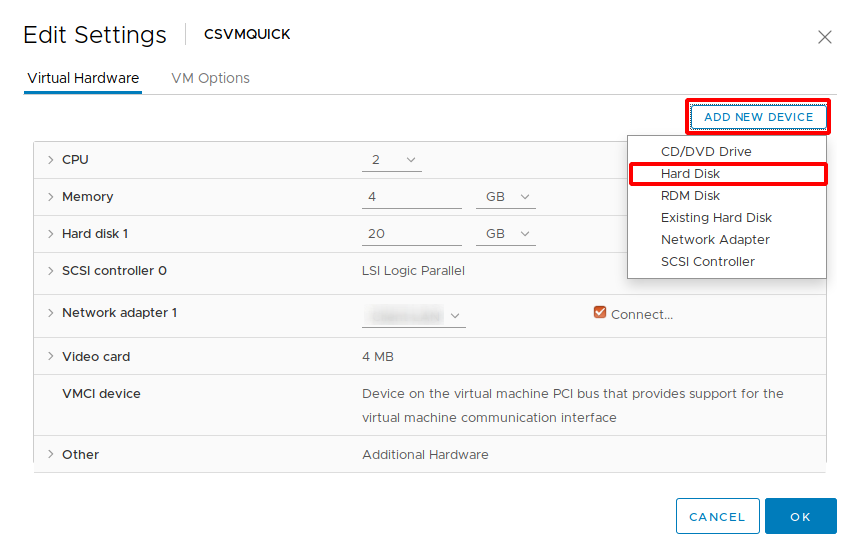
Extend available disk space for Cryptshare transfers
By default, the available disk space for uploads is limited to approx. 15-16GB. Therefore, it is recommended to add an additional virtual disk with the preferred size to the appliance.
To configure the additional virtual disk as upload directory, proceed as follows on the Linux console:
-
Log in as root on the console
-
Change into the folder /opt/cryptshare-3/appliance using the command cd /opt/cryptshare-3/appliance
-
Run the script attachHDD.sh using the command ./attachHDD.sh
The script will attach the new disk to the system and configure it as new upload directory. Rebooting the appliance is not required.
|
Setting the Temporary Upload Directory
Please note that it might be necessary to also modify the setting for the temporary upload directory (the patch is /var/opt/cryptshare-3/tmp). For detailed instructions please refer to System Startup Settings - Temporary Folder. |
Self-Installed Systems
|
Installers
Please note that the installers are only designed to perform a first-time installation of a Cryptshare Server, not to perform updates. If you want to update an existing Cryptshare Server, please use the update routine from the Administration Interface. |
openSUSE
Install the RPM package as root:
zypper install cryptshare-<version>.rpm
During the installation, the user csuser and the group csgroup are created and an init script is set up. After the installation, complete the installation of the service:
systemctl daemon-reload
systemctl start cryptshare
|
To ensure smooth operation of the Cryptshare application, it is necessary that the files in the installation directory start-cryptshare.sh and entrypoint.sh are not modified. Likewise, the service definition in /etc/systemd/system/cryptshare.service should not be edited. Changes to these files may prevent the Cryptshare application from updating successfully. |
Other Linux Distributions
-
Create the user csuser (without home folder) and group csgroup on your Linux server
useradd -M csuser
groupadd csgroup
usermod -a -G csgroup csuser
-
Log into the Support Portal
-
Download the latest available cryptshare-<version>.tar.gz package
-
Copy the downloaded package to your Linux server, e.g. to folder /root
-
Unpack the package
tar xvfz cryptshare-<version>.tar.gz
-
Move the folder cryptshare-<version> to the folder /opt and rename it to cryptshare
mv cryptshare-<version> /opt/cryptshare
-
Change the owner of the copied folder to csuser:csgroup
chown -R csuser:csgroup /opt/cryptshare
-
Change the permissions for java
chmod 755 /opt/cryptshare/jre/ -R
-
Change the permissions for start-cryptshare.sh
chmod 744 /opt/cryptshare/start-cryptshare.sh
-
Download the attached script cryptshare.service, rename it to cryptshare.service, and place the file into the folder /etc/systemd/system and take care of the lowercase notation (cryptshare.service)
-
Enable the Cryptshare service for autostart
systemctl enable cryptshare
-
Start the Cryptshare service<br />
systemctl start cryptshare
systemctl daemon-reload
systemctl start cryptshare
|
To ensure smooth operation of the Cryptshare application, it is necessary that the files in the installation directory start-cryptshare.sh and entrypoint.sh are not modified. Likewise, the service definition in /etc/systemd/system/cryptshare.service should not be edited. Changes to these files may prevent the Cryptshare application from updating successfully. |
|
Please use the following syntax, to start, stop or check the status of the Cryptshare service systemctl <start|stop|status> cryptshare |