
Microsoft Exchange Online with OAuth2 authentication
The Cryptshare Server can send emails via Microsoft Exchange Online. Since Microsoft has discontinued basic authentication for connecting to the SMTP interface, the Cryptshare Server is now able to access this interface via OAuth 2.0 authentication.
App registration in the Microsoft Entra platform
| Exact procedures are subject to change: Microsoft may change the exact process of registering applications without notice. It is recommended to familiarize yourself with the current process of registering an application with the Microsoft Identity Platform. |
| Cryptshare for Outlook already configured? Separate configuration required! If you are already using Cryptshare for Outlook, it is necessary to create a separate configuration due to different permissions and processes. |
-
Sign in to the Microsoft Entra Admin Center as an account that is a Cloud Application Administrator or greater.
-
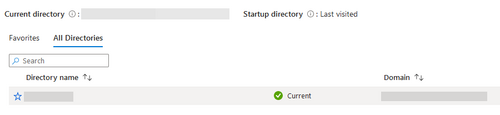
If you have access to multiple tenants, use the Settings icon in the top menu to switch to the tenant you wish to use Cryptshare for Outlook with.

-
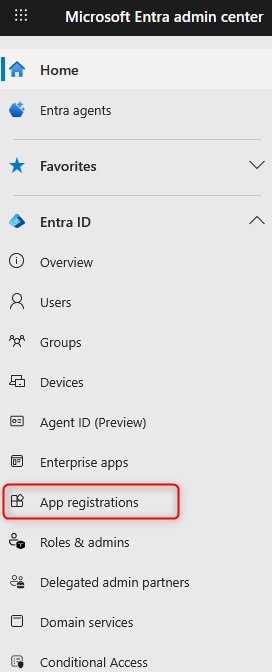
Using the sidebar, navigate to Entra ID > App registrations.
-
Create a new registration by clicking New registration.

-
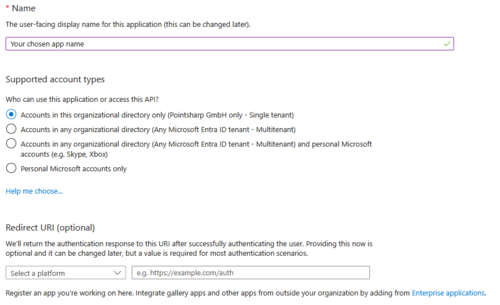
Create your new application with the following settings:
-
The application name may be chosen freely.
-
Select the account type Accounts in this organizational directory only (<your company name> only - Single tenant).
-
Do not set a redirect URI.
-
-
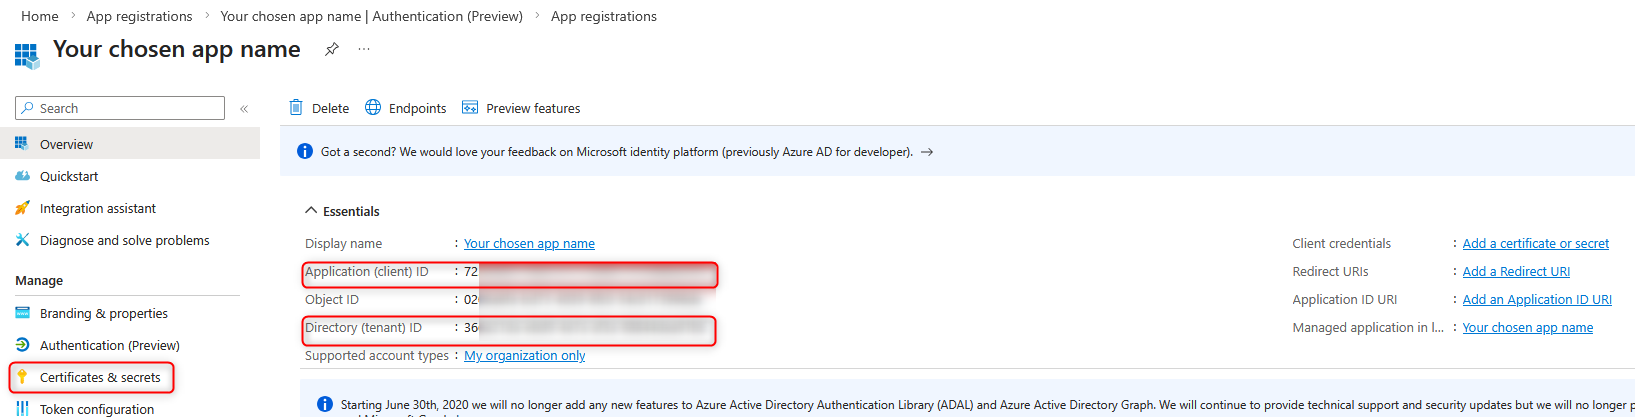
Once the application has been registered, please copy the Application (client) ID and the Directory (tenant) ID.
-
In the sidebar of the app registration, select the menu item Certificates & Secrets, go to tab Client Secrets and select New client secret.
-
The description can be freely chosen.
-
Select the desired Expires value. The maximum duration that can be selected is two years. Please note that after this period has expired, you must create a new client secret and store it in the Cryptshare Server so that the Cryptshare Server will still be able to send emails after the expiry date. We recommend setting up a calendar entry or other reminder.
-
Click Add.
-
On the next page, you will see the secret client key that has been created. Copy the string displayed in the Value column (not the Secret ID).
The secret client key is only displayed once and cannot be viewed again after leaving the page. 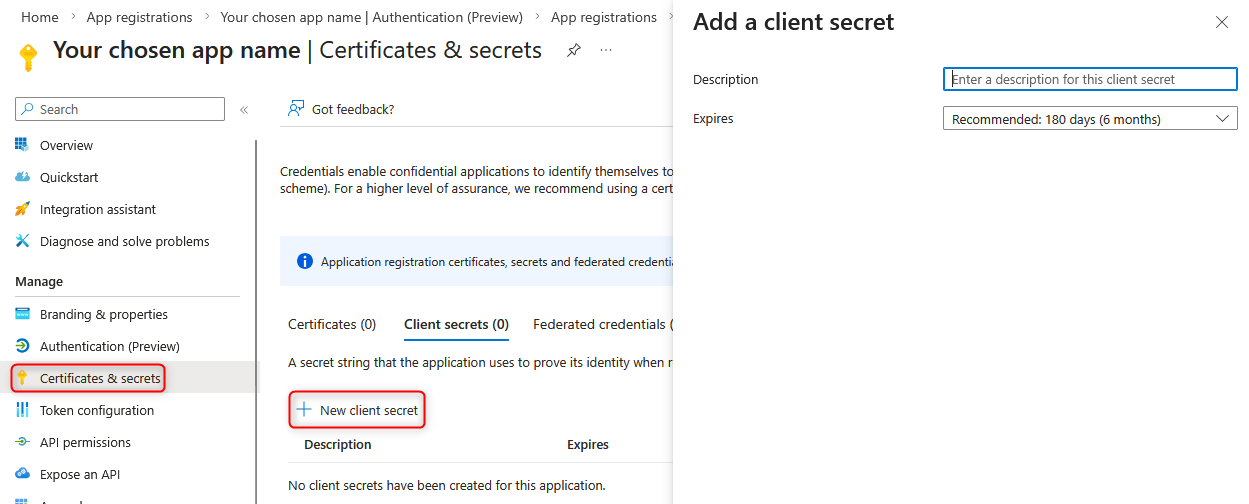
-
-
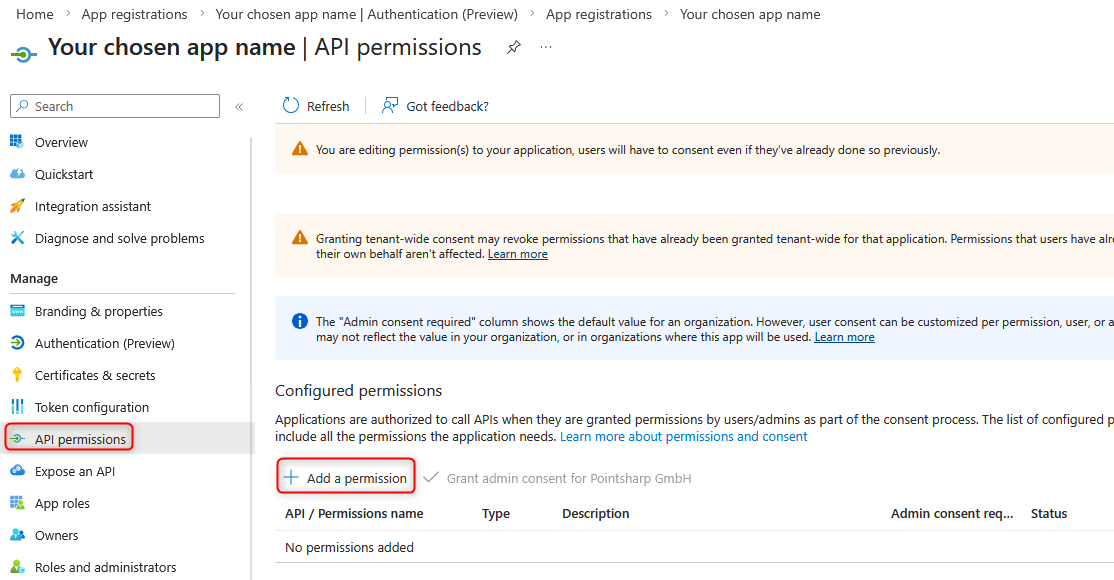
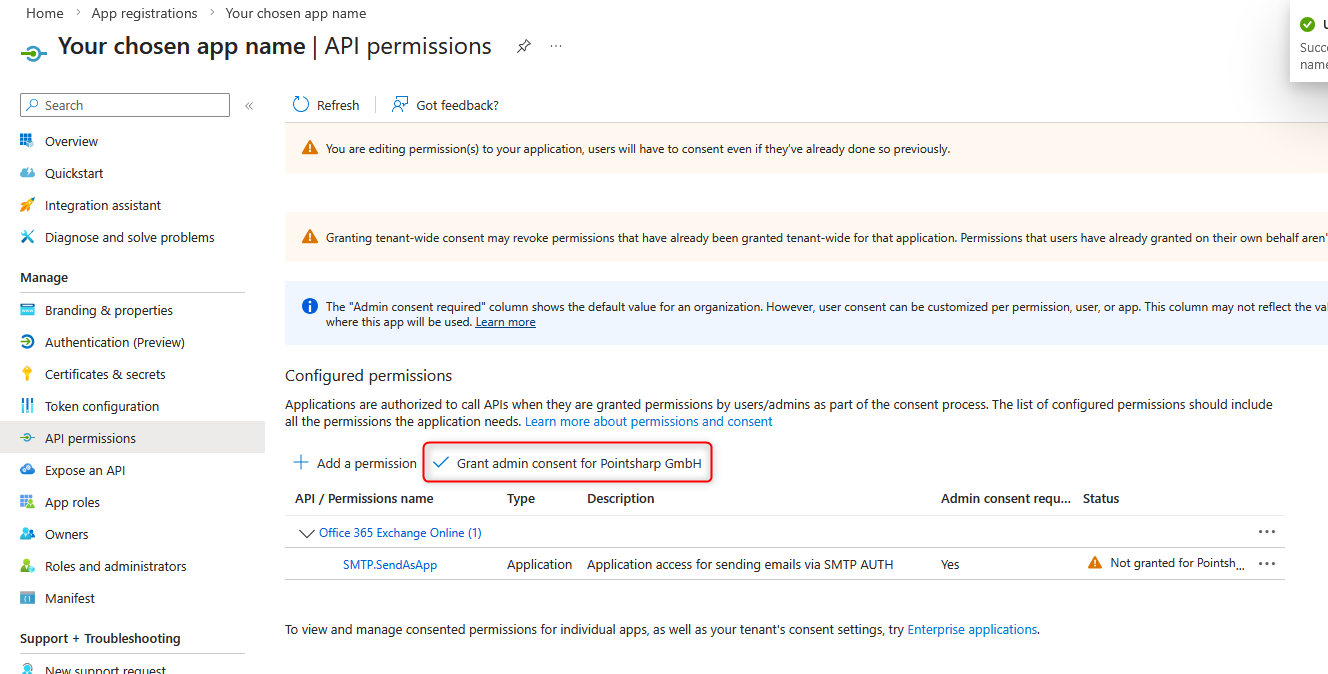
Next, select the API permissions menu item in the sidebar of the app registration.
-
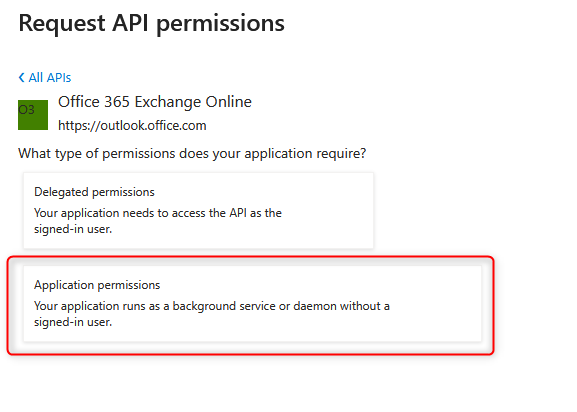
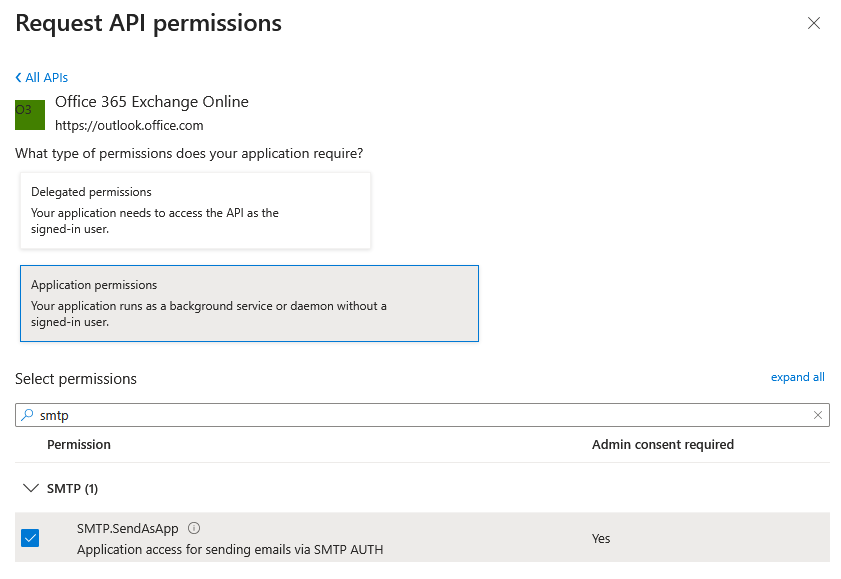
Click Add a permission, and select the APIs my organization uses tab. Choose Office 365 Exchange Online, then Application permissions and add the SMTP.SendAsApp so that they are displayed in the list.
-
Click Grant admin consent for <your company name> and confirm with Yes.
-
Go to the Enterprise apps section and copy the value from the Object ID column of your newly added application.
This object ID is different from the Object ID found in the App registrations menu item. The object ID from the Enterprise App menu item is required for one of the subsequent steps.) 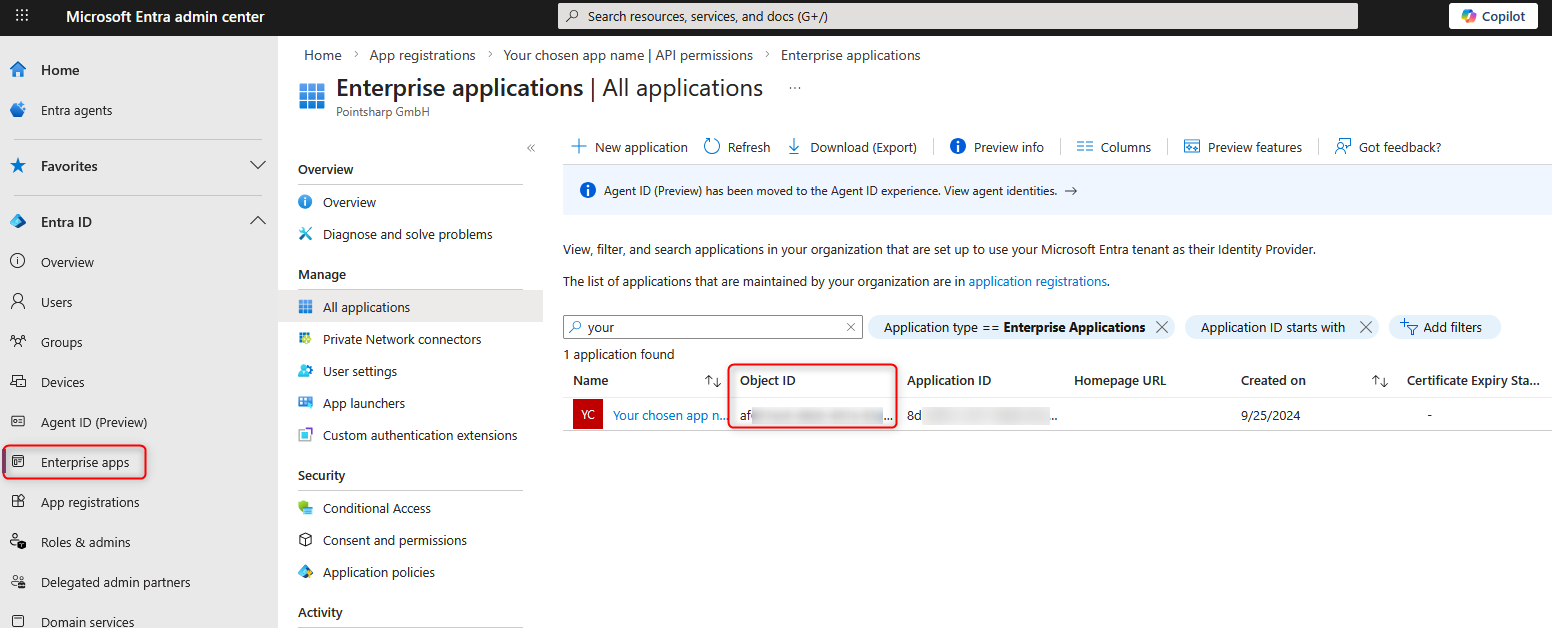
-
Now continue with the configuration in Exchange Online PowerShell.
App configuration in Exchange Online PowerShell
|
The setup steps are subject to change at any time
Microsoft may change the exact application registration process without prior notice. We recommend that you [https://learn.microsoft.com/en-us/exchange/client-developer/legacy-protocols/how-to-authenticate-an-imap-pop-smtp-application-by-using-oauth#use-client-credentials-grant-flow-to-authenticate-smtp-imap-and-pop-connections to familiarize yourself with the current process for registering an application with the Microsoft Identity Platform. |
-
Open a PowerShell console on your local Windows PC.
-
Install and connect to Exchange Online PowerShell:
-
The Exchange Online PowerShell scripts have not been digitally signed by Microsoft. Therefore, it is necessary to allow unsigned scripts to run:
Set-ExecutionPolicy -ExecutionPolicy Bypass -Scope
Process
. -
Install the ExchangeOnlineManagement modules:
Install-Module -Name ExchangeOnlineManagement -
Make the installed modules available in the current PowerShell session:
Import-module ExchangeOnlineManagement -
Connect to Exchange Online using your directory (tenant) ID from step 6 above:
Connect-ExchangeOnline -Organization <Directory ID> -
In the window that opens, log in to Microsoft Entra.
-
-
Create a new service principal for the application using the application (client) ID from step 6 and the object ID from step 11:
New-ServicePrincipal -AppId <application ID> -ObjectId <object ID> -
Then list all existing service principals with
Get-ServicePrincipal | fland find the entry whose AppId (application ID) and ObjectId (object ID) are identical to those used in the previous step. From this entry, you then need the value of the service principal ID specified under 'Sid'. -
Now assign the necessary permissions to the email address that will be used to send Cryptshare emails:
Add-MailboxPermission -Identity
"<sender email address>" -User <service principal ID> -AccessRights
FullAccess
. -
Now continue with the configuration on the Cryptshare server.
Configuration on the Cryptshare server
-
Connect to the Cryptshare administration interface.
-
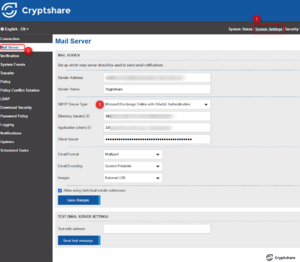
Navigate to the System Settings > Mail Server menu.
-
There, select the value Microsoft Exchange Online with OAuth2 authentication as the SMTP server type.
-
Ensure that the email address for which the mailbox permission was previously created is entered in the Sender Address field.
-
Ensure that the checkbox next to Allow using individual sender addresses is deactivated.
-
In the Directory (tenant) ID field, enter the value of the Directory (tenant) ID.
-
In the Application (client) ID field, enter the value of the Application (client) ID.
-
In the Client Secret field, enter the value of the Client Secret.
-
Click Save changes.
-
You can send yourself a test email by entering any email address in the Test with address field and clicking Send test message.
-
Then make sure that the same Sender Address is also defined in the policy rules and that the Allow using individual sender addresses checkbox is not selected.