Configuring protective email classification
To enable protective email classification on a workstation, a file called CS4OutlookEmailClassifications.xml must be placed in the Cryptshare for Outlook (Classic) program directory, which contains a suitable configuration.
The Cryptshare for Outlook (Classic) Config Creator tool is available for creating the configuration (available for download in our customer portal).
Create classification
-
Start the Config Creator by double-clicking the .exe file.
-
Click Create Classification to create a new CS4OutlookEmailClassifications.xml file.
-
Click Create Classification Example to create an example configuration with default values and modify them, instead of editing a new, empty file. The example configuration includes three classifications for non-confidential, confidential and strictly confidential content.
-
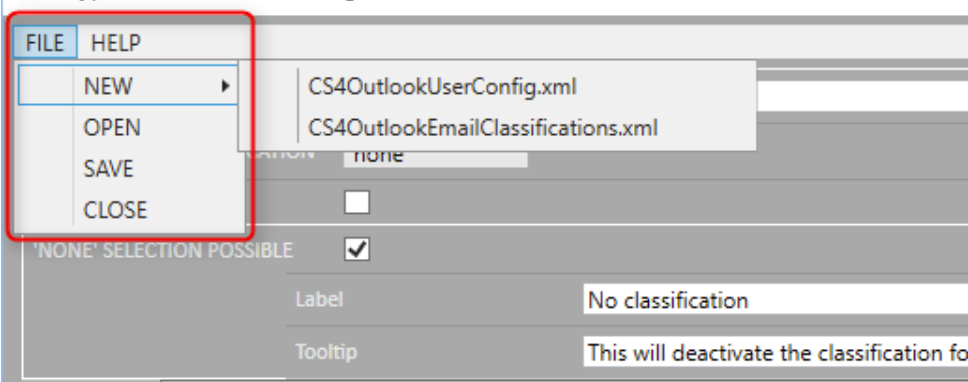
The File menu can be used to create a new CS4OutlookEmailClassifications.xml file, open an existing one, save the currently open file, or close the file.
Pre-selected classification
Select a classification to be pre-selected when a new email is generated. Select "none" to have no classification pre-selected.
| Please note that classifications must first be set up in the lower area of the configurator before these can be selected here. |
Force selection
If the "Force Selection" option is activated, the user must select a classification. It is then not possible to send the message without selecting a classification.
If the "Pre-selected classification" option already has a classification, the user can maintain it and send the message with the default classification. If the pre-selected classification is "none", a user must knowingly select a classification before sending.
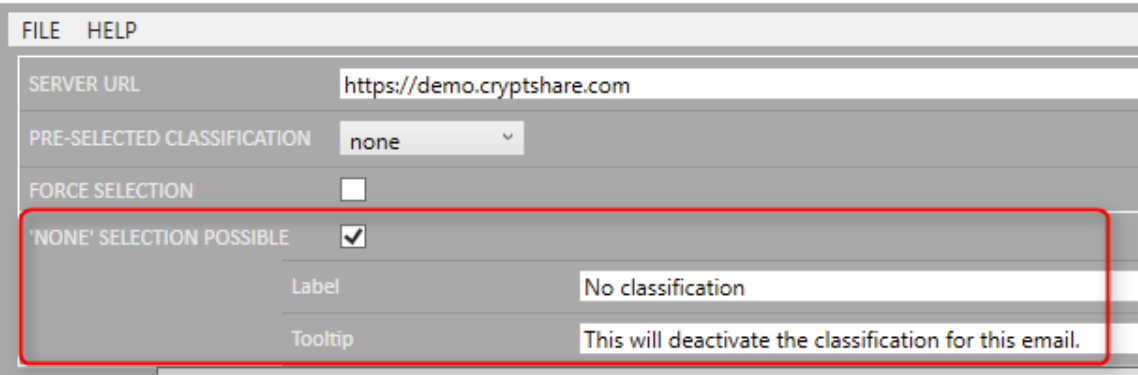
"None" selection possible
If this option is activated, the user has the possibility to explicitly assign no classification before the message is sent. This is also possible if, for example, a certain classification is set as default. A name and a help text can be provided for the option to deactivate the classification using the "Label" and "Tooltip" fields.
Create and manage classifications
Add classification
The "Add Classification" button can be used to create a new classification level. The available settings for the configuration of a classification level are displayed and can be edited. The ID of this classification level is displayed in the left pane. Up to ten different classification levels can be generated and used.
Use the arrow buttons to change the order of the classifications. The order of the classifications is also reflected in the drop-down menu for classification selection in the email composition window.
Delete classifications
Use this button to delete the corresponding classification from the list.
| Please note that this action cannot be undone. |
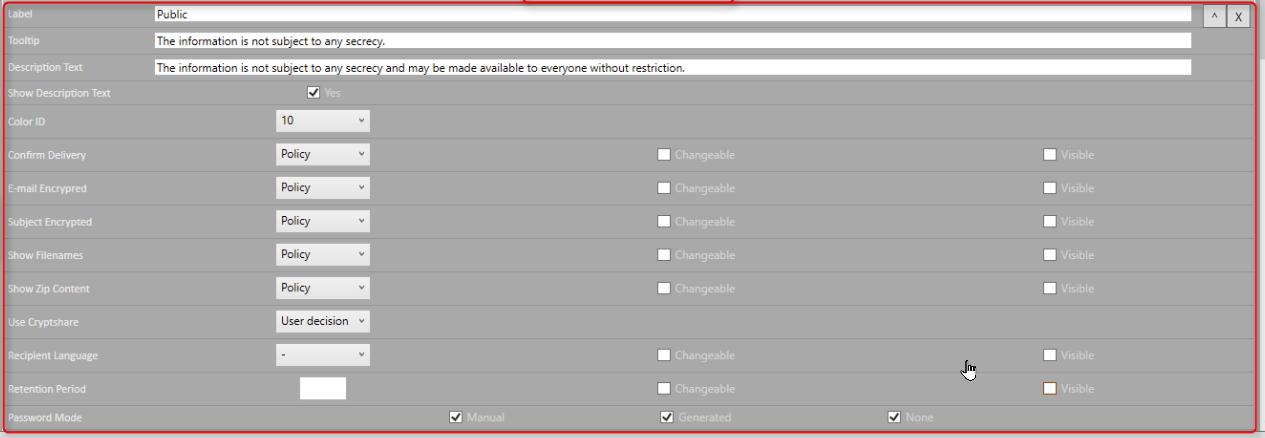
Label and description text
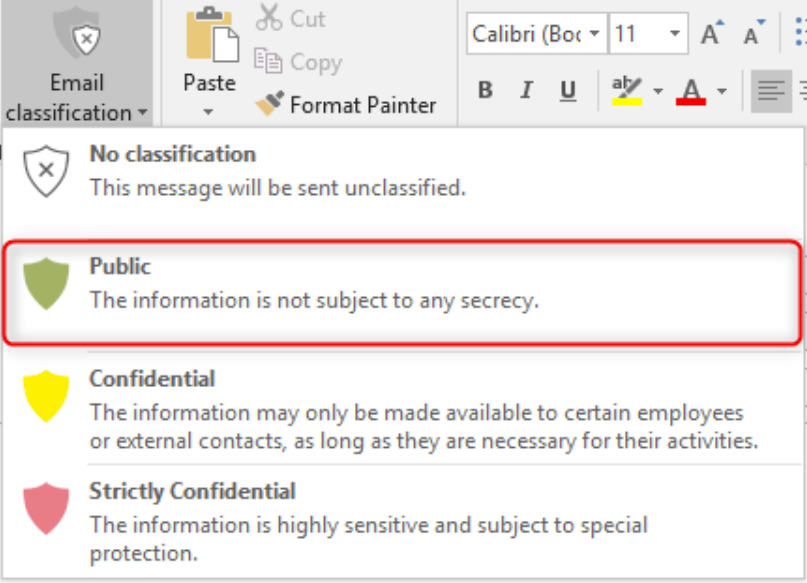
| Label |
Enter the name of the classification level in the Label field. This will appear on the button in MS Outlook. |
| Tooltip |
Enter a short tooltip help text, which is displayed when the mouse hovers over the name during the classification selection. |
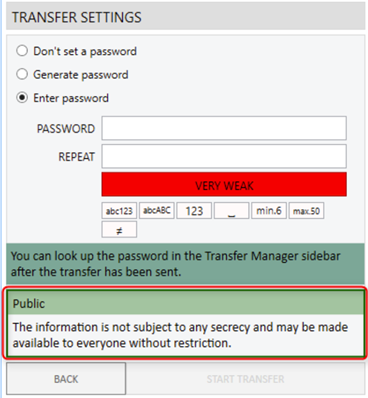
| Description text |
Enter a more detailed description of the classification level, which is displayed in the transfer options dialog box when the user has selected a certain classification and sends the message. |
| Show description text |
This option determines whether the Description Text should be displayed in the transfer options dialog box or not. |
Color ID
By choosing "Color ID", you can select a color from a color palette of 25 available Outlook-specific colors for each classification level. The selected color is displayed by the button in the email form when the classification is selected and is also used as a category color for sent e-mails in the "Sent items" folder.
Group of recipients
You can now restrict the group of recipients allowed for each classification. This can, for example, prevent accidentally sending messages to the wrong recipients. The recipient group restriction can be achieved by blacklisting or whitelisting recipient addresses and domains for each classification level. As long as the classification is selected, the black- and whitelist is applied even if the email is not sent as a Cryptshare transfer.
| Please note that the blacklisting overrides the whitelisting. |
Reference text for email recipient
For classifications, you can insert individual messages in the email to the recipient which describes the selected classification for the recipient. In doing so, specifications can be made for the positioning and design of the texts.


Managing transfer settings
Please cross-check that the settings which are configured in the classifications stay inside the frame of settings which are defined at the Cryptshare Server Policies.
Two examples:
-
If you have defined a maximum retention period of 14 days, do not allow transfers with a longer retention time in classifications.
-
If you have defined that ZIP-File Content is never shown, you shouldn’t activate the zip-file content listing in classifications.
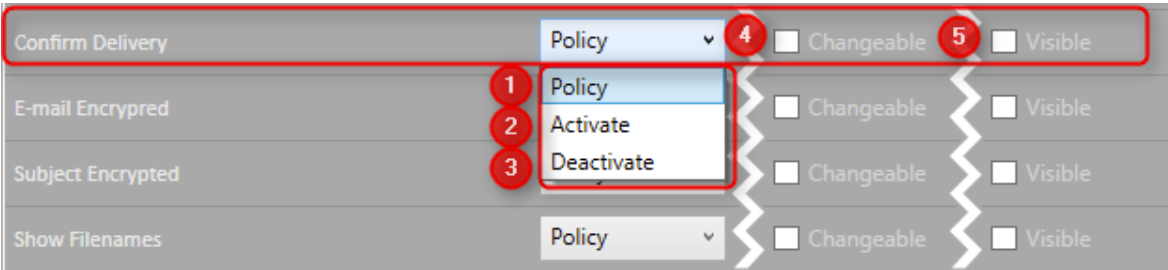
General information about configuring transfer settings
- Policy/Activate/Deactivate
-
Specify whether the setting should be controlled by the policy (1) or whether it should be activated (2) or deactivated (3), regardless of policy settings.
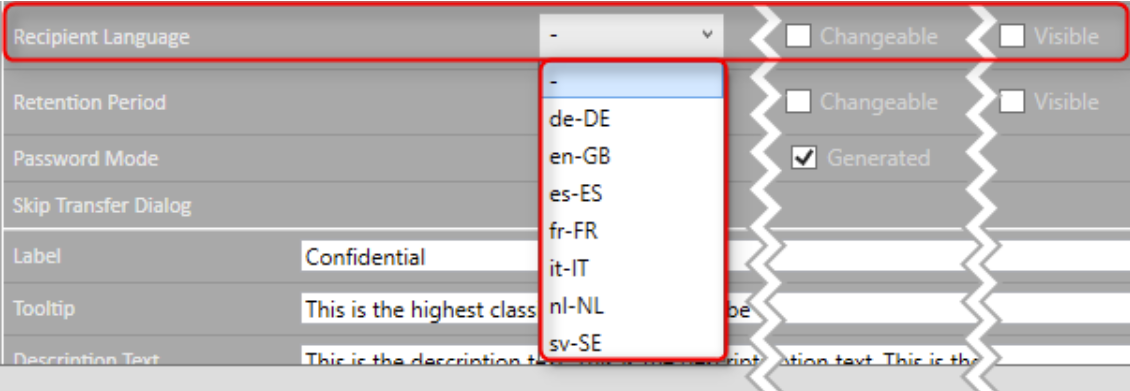
- Checkbox "Changeable"
-
The option "Visible" (5) lets you decide whether the corresponding transfer settings option is displayed or hidden in the user interface.
- Combinations of the options Visible / Changeable
| Visible | Changeable | Description |
|---|---|---|
on |
on |
The user can see and change the setting. |
on |
off |
The user can see the setting but cannot change it. |
off |
on |
The setting is not displayed and can not be changed by the user. |
off |
off |
The setting is not displayed and can not be changed by the user. |
Confirm delivery
Controls the behavior of the option "Confirm delivery" in the transfer options dialog box. This option can be activated or deactivated for each classification level.
Email encrypted
Controls the behavior of the option "Email encrypted" in the transfer options dialog box. This option can be activated or deactivated for each classification level.
Use Cryptshare
Defines how the message should be sent when the following classification is selected:
| User Decision |
The user can decide whether the message should be sent via Cryptshare or as normal email. |
| Mandatory |
Cryptshare is used for sending the message. It is not possible to send the message as normal email. |
| Forbidden |
Cryptshare can not be used to send the message. The shipping can only take place as a normal email message. |