Cluster setup — for Session Database and Gateways
Version 8.0 and later, contains a new Cluster Feature for the Gateway Servers. This enables sharing of configuration between multiple Gateways and also sharing the sessions used in the Session Database (CouchDB).
Below are the steps needed to configure the Control service, the Local Database and the Cluster Setup.
| To follow this guide it is required to have at least two installed Gateway Servers that are located in the same DataCenter and are reachable via HTTPS. |
Control
This is a service that controls and checks for updates between Gateways, if a cluster is configured. Before configuring cluster setup, enable this service, and choose your Gateway Restart Time. This is when the Gateway Control Service should check for updates and implement them.

The certificates needed are supplied automatically and can be changed to your own certificates if wanted/needed.
Click Publish and Test at the bottom of this section to enable the Control Service.
Database Setup
This part is already performed the first time the Access Gateway UI starts up and a wizard will guide you through this step. The default database setup is only aimed for the specific Gateway itself, and is only accessible locally on the Gateway Server itself.
If this initial step has not been performed, and no Local Database is created, it can be done again using the Start Cluster Wizard.
-
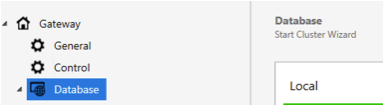
Click Database.
-
Choose Start Cluster Wizard. Either from the Quick start on the main page, or from Database > Start Cluster Wizard.
or:

-
Start the Wizard, and click Next.
-
Choose Local Database and click Next to complete the wizard.
To verify this, open the Access Gateway Admin GUI and click Database on the left-hand side. Expand Local to see the Local Database setup.
Enable the Local Database for Cluster Setup
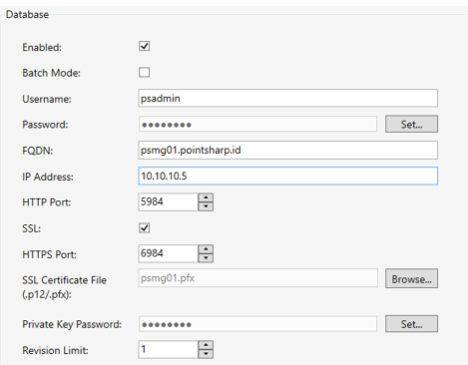
To enable the Local Database for Cluster Setup, a certificate must be added, and the Gateways added into the Cluster must be able to reach each other over HTTPS. Make sure the certificate is trusted. If self-signed certificates are used, place them in Certificate Snap-in under Trusted Root Certification Authority.
Follow these steps below to setup the database for cluster:
-
Enabled - Check this box to enable sharing of memory between processes/servers.
-
Set the FQDN Name of the Gateway that also will be used in the certificate.
-
Set the IP address to be used for access between the Gateways.
-
Enable SSL.
-
Import the certificate to be used in .p12 or .pfx format. In this example it will be named psmg01.pfx.
-
Set the Private Key Password for the certificate. Example screenshot:
-
Click the Publish button to update the Session Database and enable it for external access.
-
Do a Save and then a Publish.
The Local Database is now setup for Cluster and next step can be performed.
| Take note! These steps must be performed on ALL Gateways to be used in a Cluster Setup. |
Please continue to Export Configuration below, once all Gateways are ready with configured Local Databases enabled for HTTPS.
Cluster Setup
After a Local Database is configured and published, next step is to create the Cluster. Start with Export configuration, and then Import configuration.
Export configuration
-
Click Database.
-
Choose Start Cluster Wizard. Either from the Quick start on the main page, or from Database > Start cluster wizard.
or:
-
Start the Wizard, and click Next.
-
Choose Create Cluster and click Next. This will create an export file. This file is then imported into the secondary Gateway Server.
-
Save the export file to location of choice.
Import configuration
Move the exported file to the secondary Gateway Server. Before importing the configuration file, make sure the secondary Gateway Server already has a configured Local Database. If no configured Local Database exists, follow the steps mentioned previously in Enable the Local Database for cluster setup.
Once completed, follow these steps:
-
Click Database and initiate the Start Cluster Wizard.
-
Take note of the warning text and then click Next.
-
Locate the exported file from the primary Gateway Server and continue the Wizard to import it.
-
Once imported, a summary of the involved Gateways will be displayed as well as the databases that will be created in the CouchDB (Session Database).
-
Finish the import by clicking Next and Apply.
-
Do a Save and Publish.
In the Database section of the Access Gateway UI there will now be status windows showing the Clusters' connection status.
| You may need to restart the Access Gateway UI to see the latest Cluster Status. |