Exchange - Distribution Lists
Distribution Lists must be created in Entra ID/Exchange after which they are automatically created in Compliance Suite and any memberships are transferred.
You can learn more about how to create so-called Distribution List Groups in Microsoft’s own guide here.
You can find all active Distribution Lists created in your system by navigating to "Distribution Lists" in the "Connectors" sub-area.
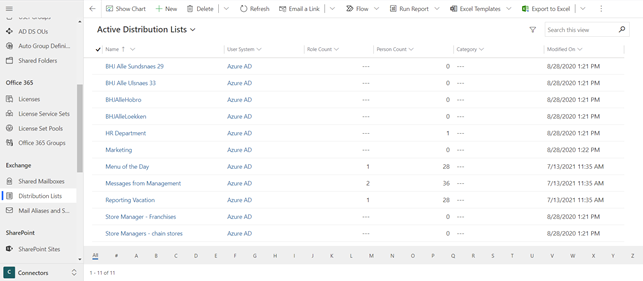
When you click on a Distribution List, you will be able to see which "User System" the list comes from and the e-mail address of this list.
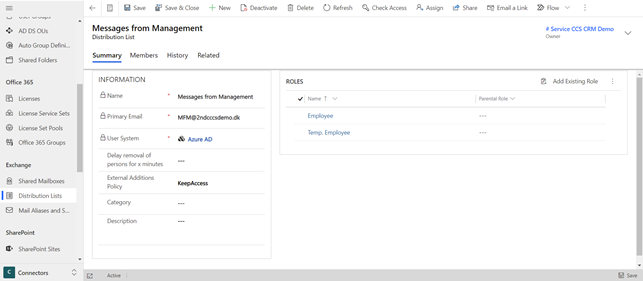
Via the field "Delay removal of persons for x minutes" you can define delayed removal of membership to the list. If a person loses the role giving access to the distribution list, the person will still be a member of the list for the defined number of minutes. This ensures that Compliance Suite’s Cloud Connector has time to delete the person from Exchange.
You can select the option "Keep Access" or "Remove Access" at the field "External Additions Policy".
Keep Access: If you add users directly in the external system, the membership of the list is imported. The list now has the members from the role as well as the manually added members.
You can also add a category to a Distribution List. This attribute is not synchronized to other systems since "Category" is an internal Compliance Suite attribute that can be used for filtering. "Description" is used for a description of the list.
Under "Roles", you can add existing roles that will grant people in your organization membership of the distribution list.
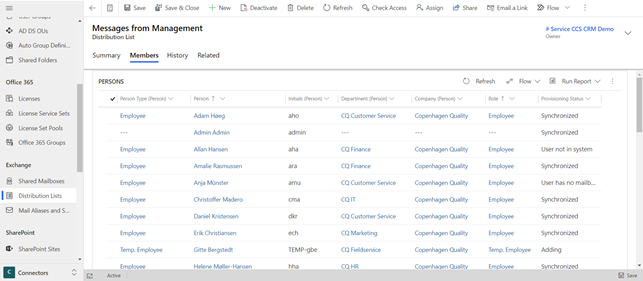
The "Members" tab gives you an overview of all members of the list:
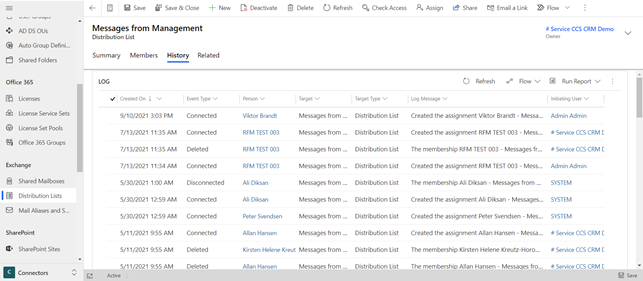
The "History" tab gives you an overview of the distribution list’s Audit history and log, and you can see who has been granted and revoked membership of the list and when.