Configure and set up Net iD Portal
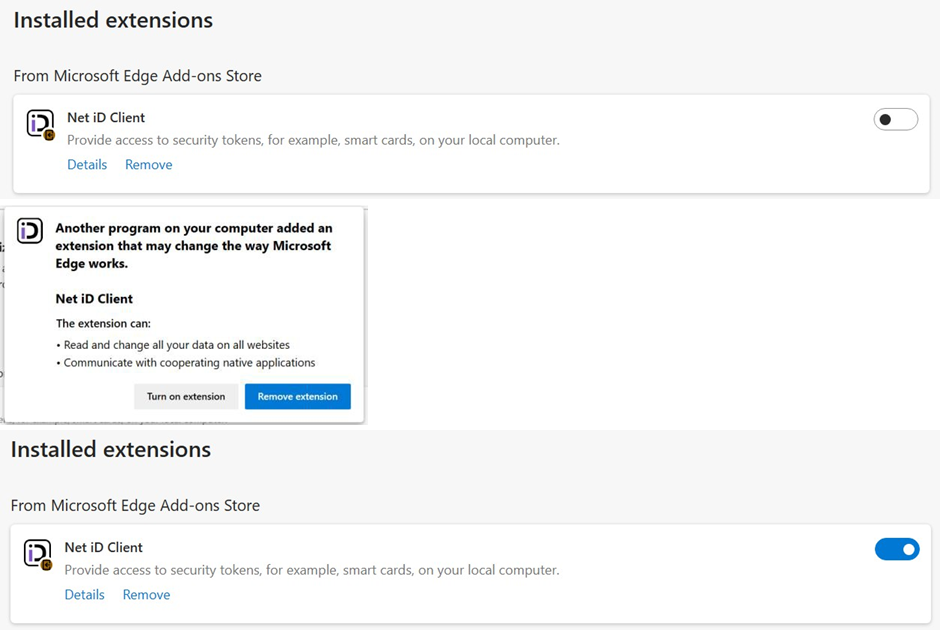
Activate the Net iD Client web extension
The installation package includes the installation of Net iD Client. Below are instructions for connecting to the Net iD Portal from other machines.
-
Install Net iD Client on your computer by double-clicking the installation program, and then follow the instructions in the installation dialog.
-
Open a web browser (Edge, Chrome etc.) and activate the Net iD Client Web Extension.
-
Open the Windows Registry and configure the Net iD Portal’s URL in the following registry keys HKEY_LOCAL_MACHINE\SOFTWARE\Policies\Pointsharp\NetiD\Client\Plugin\AllowURL
-
Name: 70
-
Type: REG_SZ
-
Example:

-
Enroll the first e-identification
Log in to Administration
-
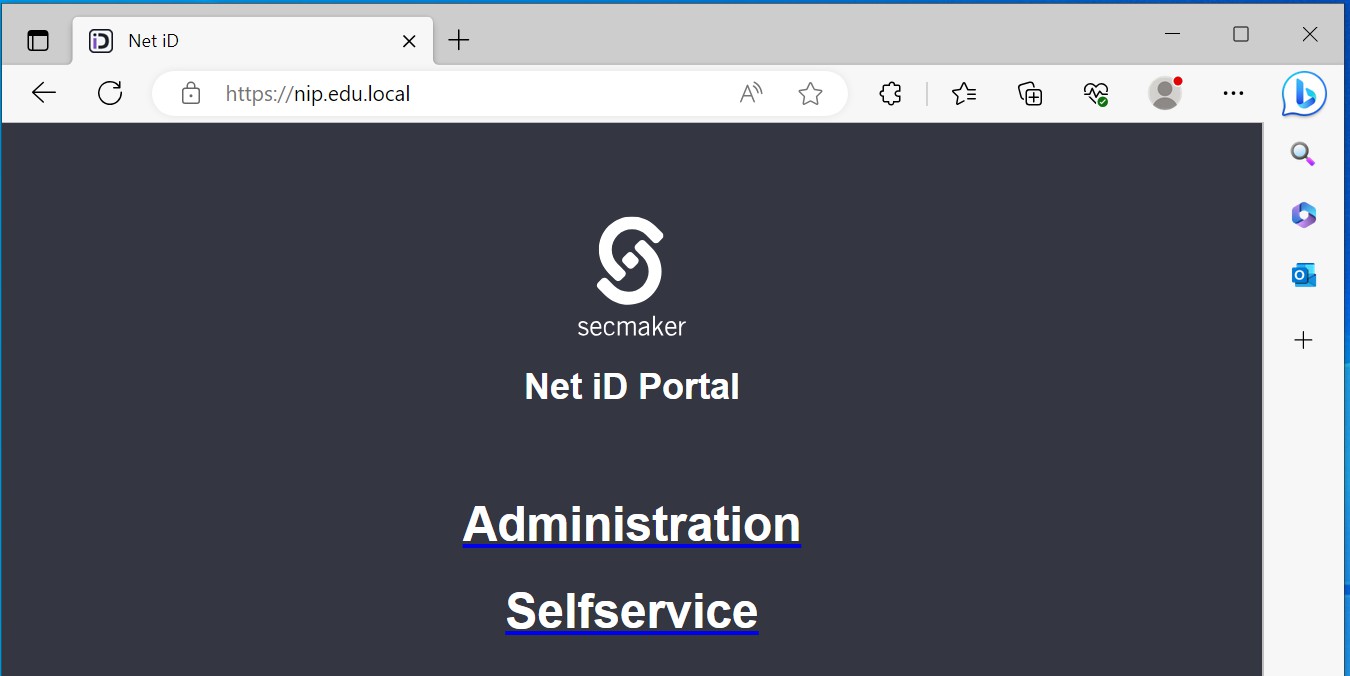
Open a web browser and go to the Net iD Portal web page.
-
Click Administration to log in to the Net iD Portal in setup mode.
-
If you opened the web page from the installer, you will be logged in automatically.
-
If not, log in with the OTP code that you got from the installation.
-
Create the user
-
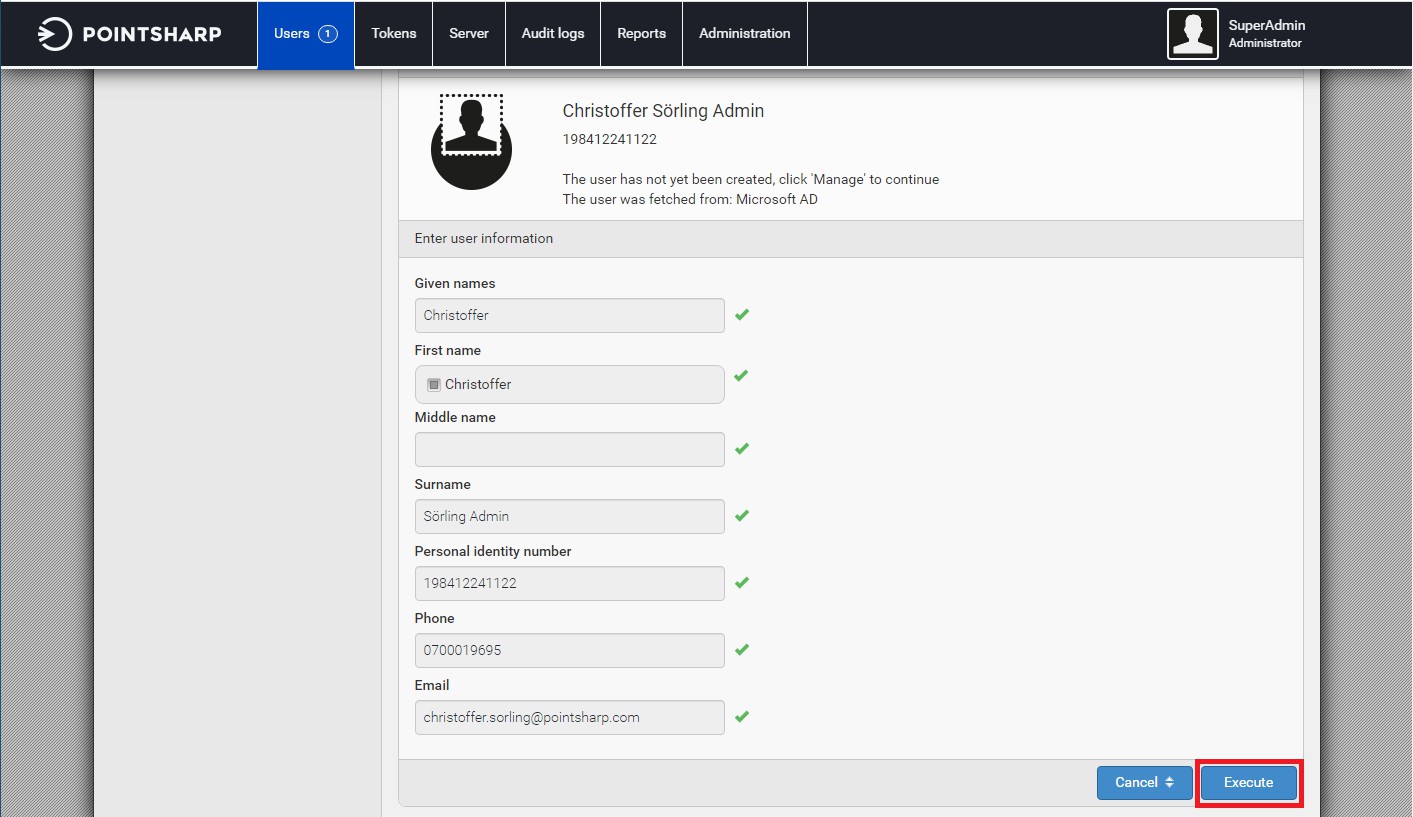
Click on the Users tab and search for the first user that we are going to enroll. In this example, we will search for the admin user.

-
Click the user in the list, and then click Execute to create the user in Net iD Portal.
-
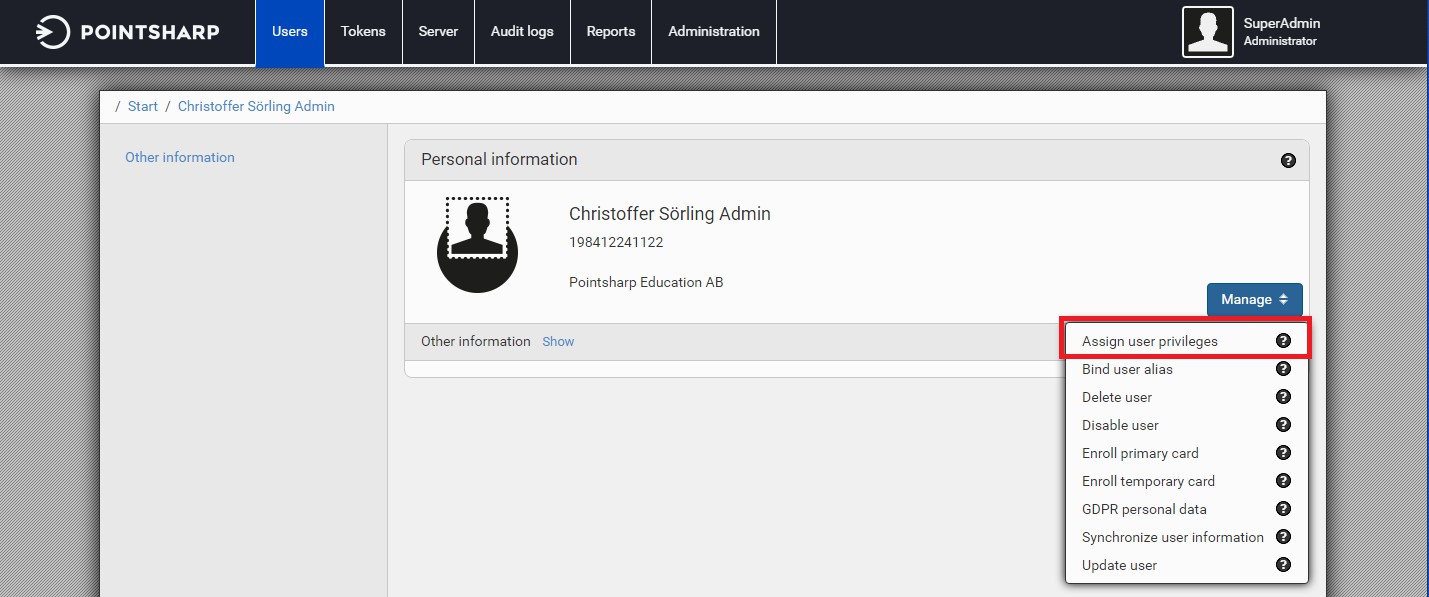
On the page of the created user, click Manage and then click Assign user privileges.
-
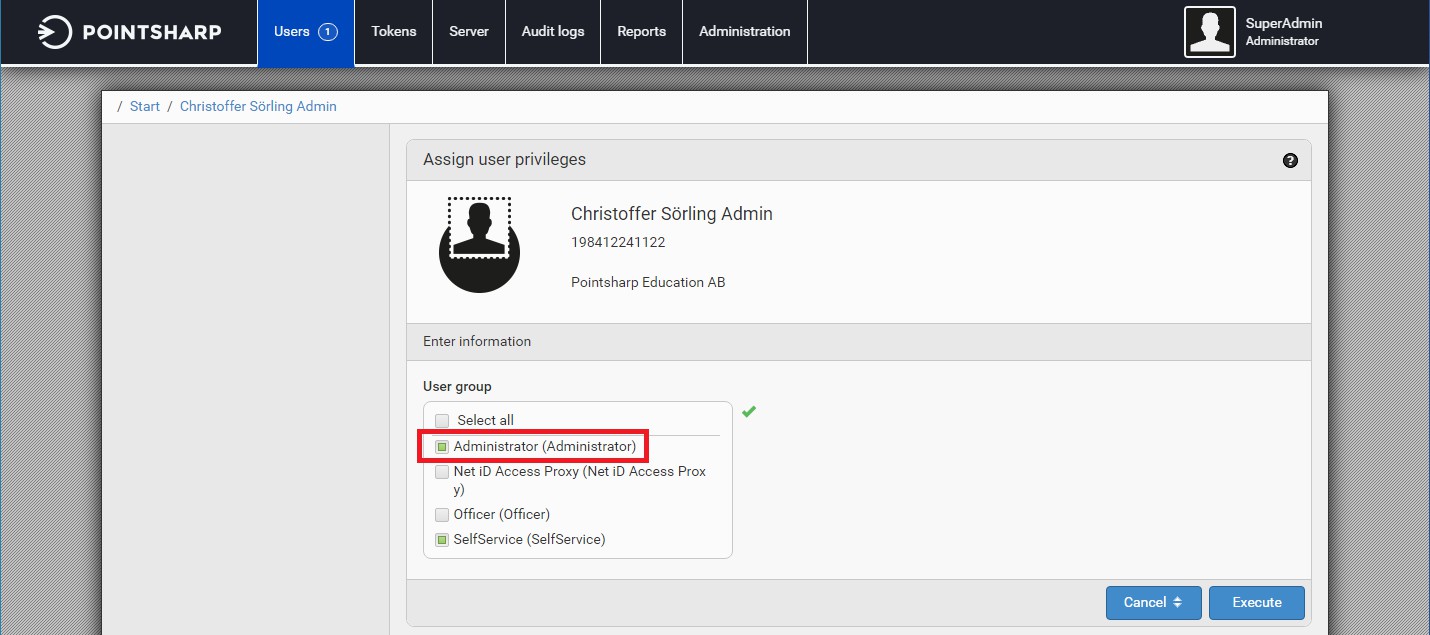
Under User group, select the Administrator check box, and then click Execute.
-
We have now created the administrator user in Net iD Portal, and assigned the needed privileges to the role.
Enroll the user’s e-identity
-
Insert the key bearer, such as, a smart card or YubiKey into a card reader or USB port on the computer.
-
Click the Users tab.
-
Go to the page for the user that was created earlier in this procedure.
-
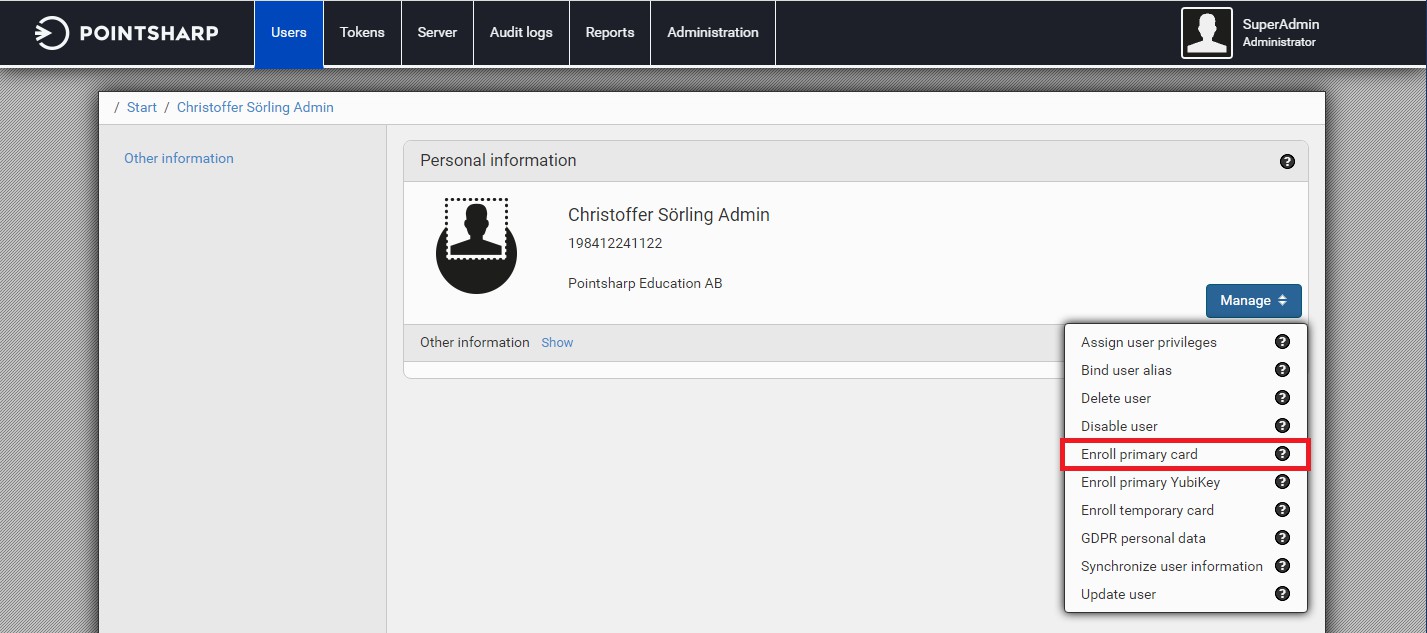
Click Manage, and then click Enroll primary card or Enroll primary YubiKey.
-
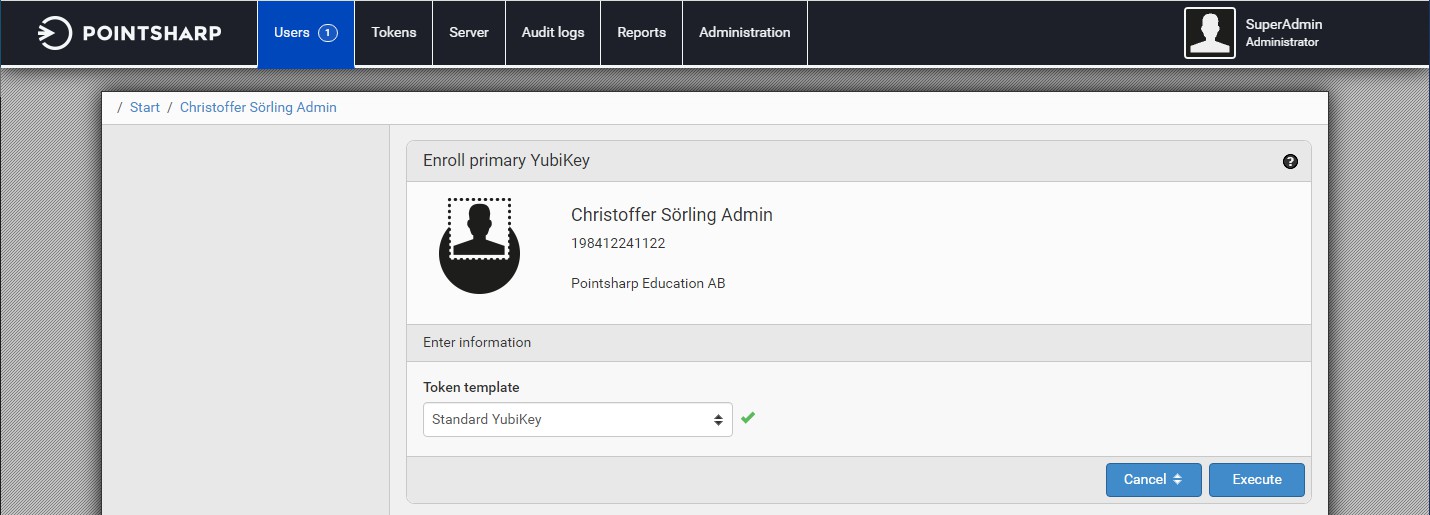
Choose the preselected Token template, and the click Execute.
-
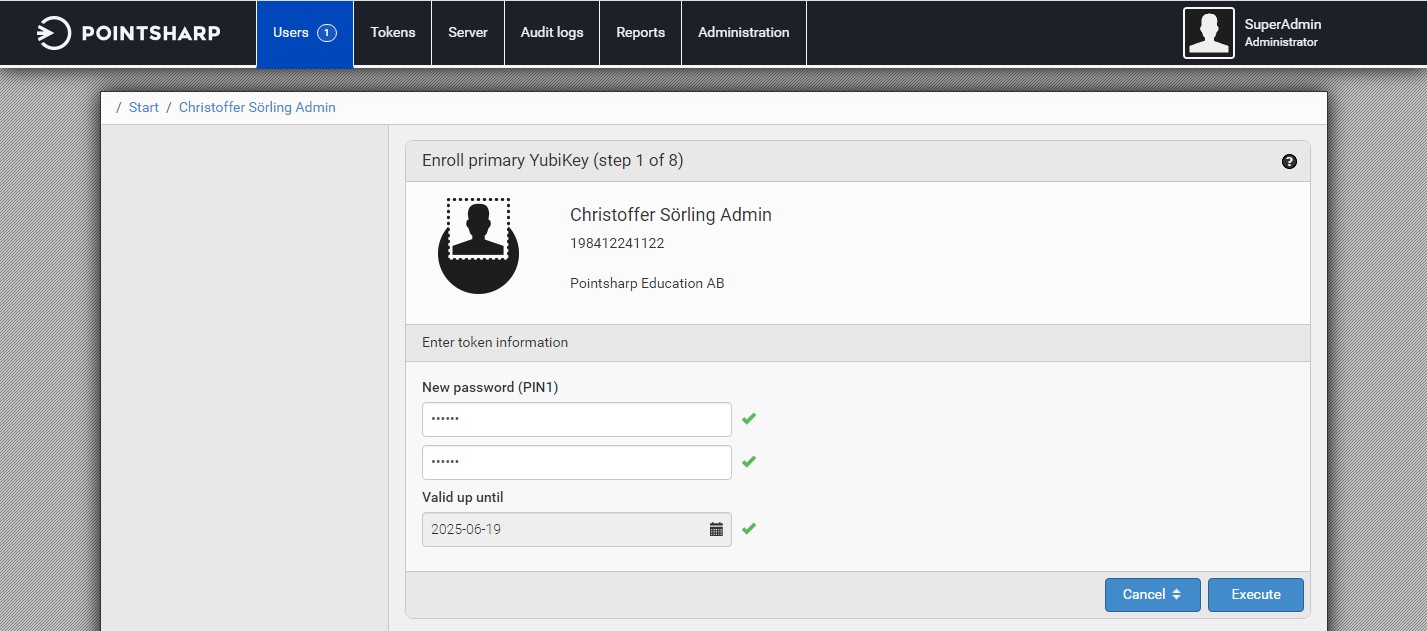
Choose a PIN for your e-identity, and then click Execute to start the enrollment.
-
When the enrollment is finished, the e-identity is stored on the keybearer (smart card or YubiKey).
Finish the set up
-
To log out from Net iD Portal, click the menu in the top-right corner, and then click Logout.
-
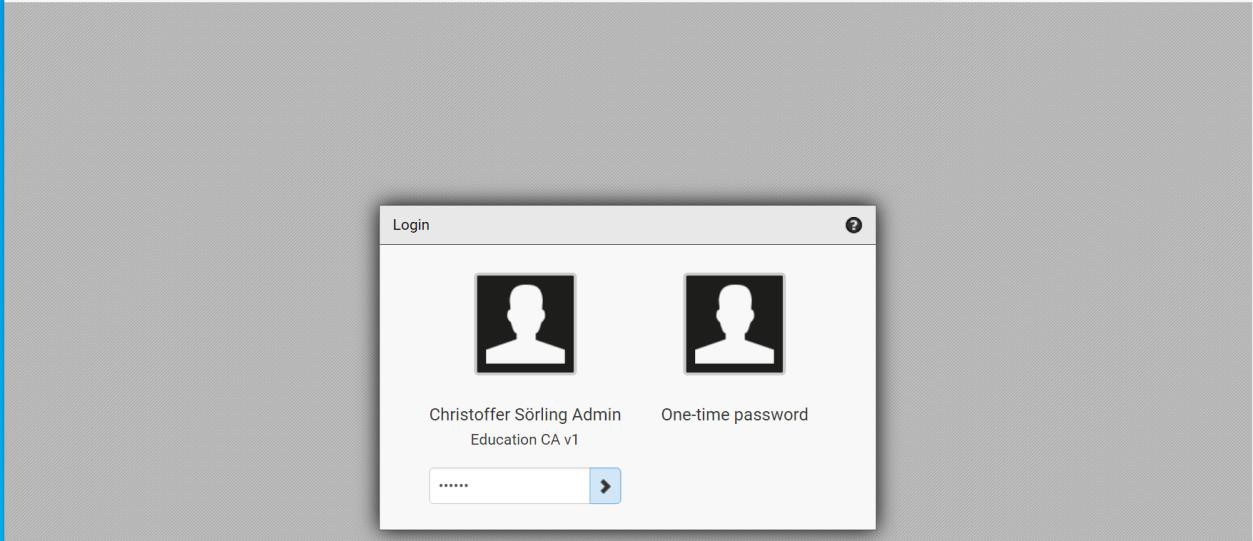
Click your admin user, and then type the PIN and press Enter to log in with your e-identity.
-
You are now logged in to Net iD Portal with your admin account, so we need to finish the setup mode.
-
Click the Administration tab, click Manage in the bottom left corner and then click Initial Setup - Apply.
-
Log in to your web server where Net iD Portal is installed.
-
Start the setup wizard, and then click Next.
-
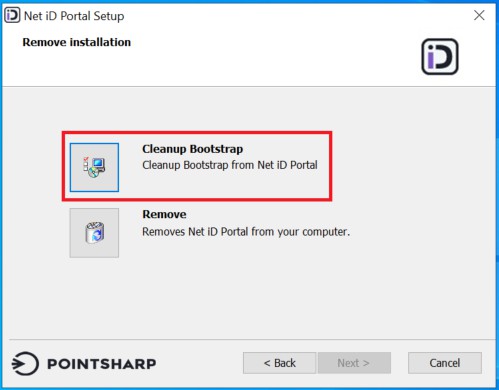
Click Cleanup Bootstrap, and then click Next.
-
Click Finish to finish the installation.