Create login towards a basic website
Create a modForms module — this is the module that handles the Access Gateway Web based logins.
| The guide assumes that a valid certificate is already in place. |
-
Create a
modFormsmodule. -
Create a Listener that the
modFormsmodule will be added to.
How to create a modForms module
-
Open the Access Gateway Admin GUI.
-
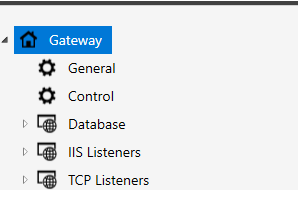
On the left hand side, right-click Modules.
-
Choose Add module
This will start a wizard that will guide you through the next steps. -
In the wizard: Click Next and then click Authentication and Form-Based Authentication.
The name that is requested is a "Friendly Name" for the module itself. Recommended to set a name that explains that this module is for this website. This will make the configuration more understandable later on if changes are to be done.
-
After the name has been set, scroll to the Authentication Methods.
Add the authentication method you want to use.If you want to use a specific authentication method for this Listener, you need to create the authentication method in the Pointsharp ID Server Admin.
Using a specific authentication method with a name that explains what it is used for, will help troubleshooting as well, since that authentication method name will be displayed in the logs in the Admin Portal.
You can also use multiple authentication methods for a modFormsmodule. Then there will be a drop-down list on the login page that displays all the methods that are available for use.
-
Continue the Wizard and complete it with Apply. The
modFormsmodule is now created and ready to be used. Next step is to create a Listener that themodFormsmodule will be added to.
Create Listener
| The guide assumes that a valid certificate and a modForms module are already in place. |
-
Open the Access Gateway Admin GUI.
-
On the left hand side, right-click IIS Listeners.
-
Choose Add Listeners
This will start a wizard that will guide you through the next steps. -
Set the Address. This is the external DNS name to be used for this Listener in the Access Gateway.
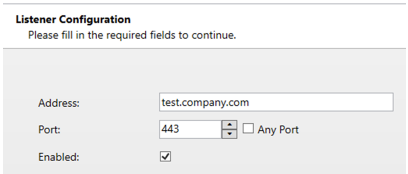
-
Scroll down to the Rules section, click Add.
-
Next page contains several options. These listed below are needed for this specific scenario. Please click in the ? in the top right corner for explanations of all values, this guide does not use them all for a basic website.

Name: A friendly name, for example, if it is an intranet site.
Path: The path that this rule is valid for. In this example we add
/intranet.HTTP Host Header: Not used in this example, the From Request is unchecked.
Keeping it unchecked is needed, since we have an external DNS that is named, for example, https://intranet.company.com, but the internal resource uses another path that is https://test.company.local.
The path towards the backend server will be https://intranet.company.local/intranet when From Request is disabled. If enabled, the path would be https://intranet.company.com/intranet.backend server URL: The path towards the Server to which the Access Gateway should proxy the traffic.
-
Scroll down to Module Configuration Names and add the
modFormsmodule created at the beginning of this guide. -
Apply the correct
modFormsand finish the Wizard. -
You should now be able to see a new Listener, added with a rule for the intranet site using the Access Gateway’s login page with the authentication method (or methods) that was configured.
-
Save and Publish to complete the configuration.