Secure message and file transfer
Installation and configuration have been completed successfully. You can now start using Cryptshare for Outlook (Classic).
Prior to first use, Cryptshare requires verification of your email address. See Verification.
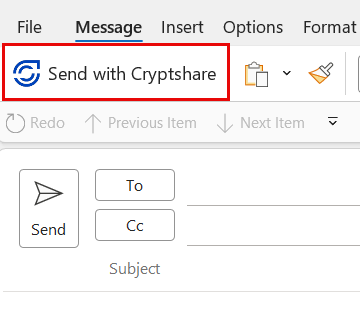
Send with Cryptshare
-
Click New email to create a new message.
-
Click Send with Cryptshare in the upper left corner of the email window. This will activate Cryptshare. If you have already started composing the email, the message can be seamlessly processed as a Cryptshare email.
-
Enter the recipient’s email address, just like when writing a normal email. Separate several recipients with a comma or a space.
Add files
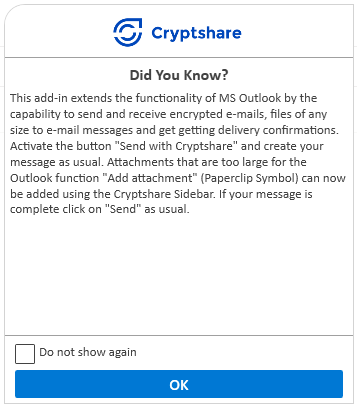
Cryptshare attachment notification
If you are not already using Cryptshare to send the file, an informational pop-up may appear to notify you that this option is available. This pop-up appears when you click Attach File in an Outlook (Classic) email and select Browse This PC.
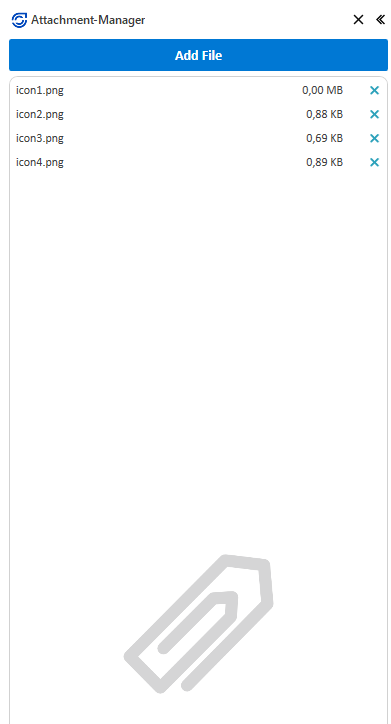
Attachment Manager
On the left-hand side of the email, you will see the Cryptshare Attachment Manager.
Files that may already be attached to the message will be transferred to the Attachment Manager. Via the Attachment Manager, you have the option to attach more files to the Cryptshare email.
| It is possible to send files that exceed the size limit allowed by MS Outlook. |
-
Click Add File to open an Explorer-window where you may browse your PC for files and add them. Alternatively, just drag-and-drop your files.
-
Once all attachments have been added, the email has been composed, and all recipients have been selected, click Send to proceed to the Transfer Dialog.
You can also continue to use the options for attaching files known from MS Outlook as usual. The files are attached directly to the Cryptshare sidebar. For some of Outlook’s own ways to attach files, depending on the option used and the version of Outlook, a notice may appear that files of this size cannot be attached. In this case, use Cryptshare Attachment Manager to add the files.

Cryptshare email draft
If the dialog for creating an email is closed accidentally or intentionally, a warning appears along with whether the message should be saved in the drafts. All files attached at the time of closing will be taken over and displayed within the Cryptshare Attachment Manager.
If not all attached files can be found when calling up the draft because they have been deleted, renamed, or moved in the meantime, you will receive a warning about this issue. All regularly findable files are listed as usual within the Cryptshare Attachment Manager.
Add folders
You can add entire folders, including files and subfolders, by dragging them to the Attachment Manager. In this case, Cryptshare for Outlook (Classic) suggests that you create a ZIP archive in order to be able to transfer the folder structure in its original form with all files and subfolders in it.
You have the option of giving the ZIP archive a name and clicking Yes to start creating the ZIP archive.
Selecting the No option will attach all files in the folder structure directly to the sidebar. The structure of the folders is lost in the process.
Add folders + files
If further files are added at the same time as a folder, for example a folder and three PDFs are marked and added as a group via drag & drop, the three PDFs are also compressed and are located within the zip file. For this purpose, a folder is created that bears the name of the original parent directory and contains these files.
Transfer dialog
The transfer options are described in detail below.
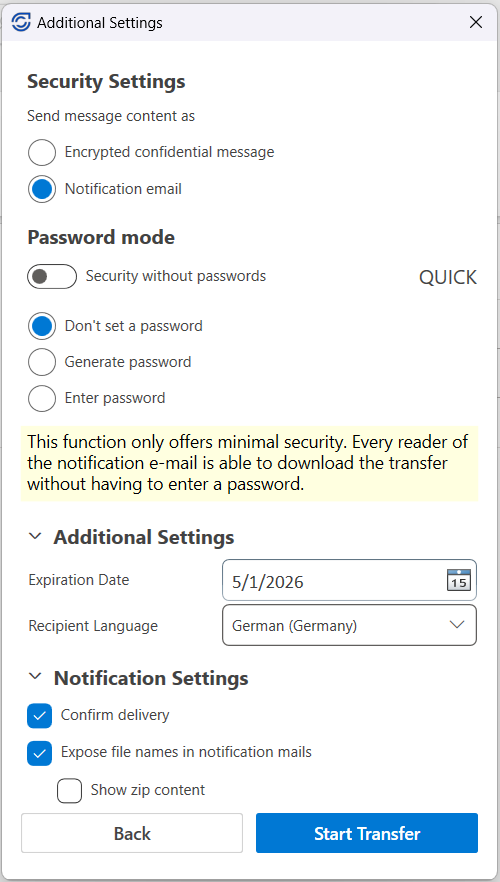
Encrypted confidential message
With Cryptshare you have the choice of shipping files securely, and transferring both the message and the subject encrypted. Select the option Encrypted confidential message.
The download notification that will be sent via email to the recipient, as well as the subject seen in the Transfer Manager at the recipient, has the neutral subject "Confidential Message". The subject is visible only after download in the decrypted message.
Notification email
A Notification email will look just like a regular email, with a visible subject and a visible text message.
If a file is being added, the file will be sent with Cryptshare, with the possibility to use the password options.
In the Notification settings you can choose if the filenames should be exposed or not; Expose file names in notification emails.
Note that the message and subject will be visible for the sender and recipient, if sending as a notification email.
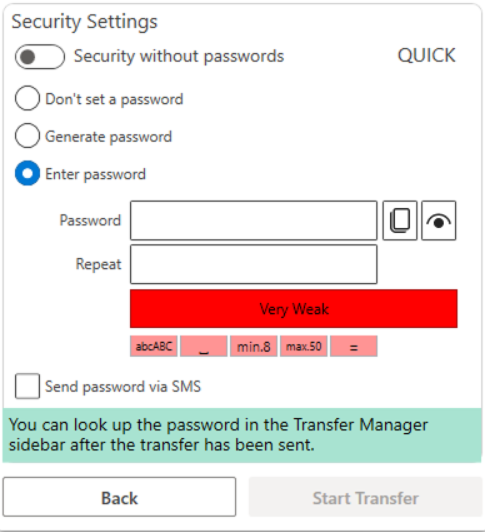
Send with QUICK
Quick is an established secure connection between the sender and the recipient. Once the QUICK connection with the recipient is activated, entering passwords is no longer necessary.
Activate the Security without passwords option to use QUICK.
To activate and use a QUICK connection, follow the instructions in QUICK — a permanent secure connection.
Password options
If QUICK is turned off by disabling the "Security without passwords" option, the transfer remains encrypted, and you can use a password to provide additional security.
-
The option Don’t set a password enables the sender and the recipient to exchange large files easily, without having to exchange passwords. The data is transferred fully encrypted. However, the level of security is lower, since anyone gaining access to the notification email, has access to the files.
-
You can have the system to Generate a secure password for you. You can look up the password in the Transfer Manager after the transfer has been sent.
-
Or Enter a password of your choice. Select level of strength to be applied.
-
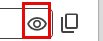
The password preview icon allows you to temporarily display the password you have entered in the password field:
-
Click the copy password icon to easily retrieve the one-time password:
| Share your password with the recipient via telephone or SMS, otherwise they will not have access to the documents or message. |
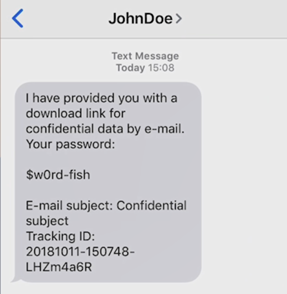
Send password via SMS
It is possible to connect Cryptshare for Outlook (Classic) to an SMS gateway. In the configured state, the recipient receives an SMS with the following data: name of the sender, subject of the Cryptshare transfer, tracking ID and the transfer password.
The use of this feature is only possible if it has been configured by the administrator beforehand. See SMS Gateway to learn how to configure an SMS gateway.
-
Activate by clicking the checkbox Send password by SMS.
-
Select phone number.
-
The add-in offers you all the phone numbers that are found for this recipient to choose from, and you can use the drop-down menu to switch between multiple phone numbers if available.
-
If the number to which you want to send the password is not offered, you can also enter the corresponding number manually.
-
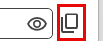
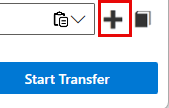
Paste from clipboard: With the help of the clipboard button, you can paste phone numbers that you have previously copied to the clipboard. Please note that the keyboard shortcut Ctrl+V may not be available for pasting, and in this case you will have to fall back on the "copy-button" provided.
-
-
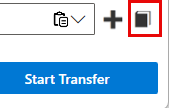
Click Start Transfer to send the SMS.
Switch to the Outlook address book
It is advisable to keep the Outlook address book entries of the respective recipients up-to-date in order to save yourself the manual entry of the phone numbers. With the help of this button, you can switch to the Outlook address book and e.g. adjust a recipient’s phone number.
Additional settings
Expiration date
Sent files are only stored on the Cryptshare Server for a certain period of time, during which they can be downloaded by the recipient. After this period, the files are automatically deleted from the server, no matter whether they have been downloaded or not.
The recipient is automatically informed about the selected retention period.
Notification settings
Confirm delivery
Choose if you want to be notified about the retrieval of the transfer.Please note that this will result in an email sent to you, as a sender, for every download action on the recipient’s end.
Expose filenames in notification mails
Decide whether the name of the files should be exposed in the notification email at the recipient, as well as at the sender.
This option allows you to control whether the file names of your file attachments are part of the notification email to the recipient and the corresponding download confirmation.
Since the notification emails are regular, unencrypted emails, the option should be disabled for security reasons if the file name already contains confidential information.
If selected, the filenames will be visible for both the sender and the recipient.
The same behavior and logic applies to Show zip content.
The transfer
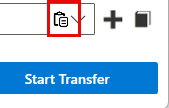
Start the transfer by clicking Start transfer. The process is presented with a dialog indicating the progress of the active transfers.
Your files are transmitted securely to the Cryptshare Server and are stored there encrypted.
The progress of the uploading process is displayed, until Successfully finished.
| See Retrieve files for instructions in detail on how to download the message and its associated files. |
Transfer manager
The transfer status is available with live status information for the sender to see. This will help keeping track of the transfer, and to check if the recipients have actually accessed the files. The recipient will receive a link together with the notification email to access the transfer details.
Both the sender and the recipient can use the Transfer Manager to access all the upload and download options.
Cancel transfer
It is up to the sender to have the active transfers completed or to cancel them. By clicking Cancel Transfer while the transfer is ongoing, all active incoming and outgoing transfers will be canceled and Outlook will be terminated.
| The sender has the option to revoke the already sent message and files. This is done by using the Revoke function. |
Deactivate Cryptshare
You can deactivate the sending of a message via Cryptshare by clicking on the "X" in the upper right corner of the Cryptshare Attachment Manager.
Your message will then become a regular Outlook email again and will be sent unencrypted when you click "Send".
If you have attached files to the message that are too large to be sent as regular Outlook emails, you will be notified when you deactivate, and have the option of removing files from your message until the size limit for regular Outlook emails is reached.